


2 TIPS AND TRICKS - Wondering how to replace the front disc on your MX bike?
We present you 5 TRICKS and TIPS on how to take care of your motocross bike.
In cooperation with Roman Jelen, a former motorcycle rider with many flattering achievements, we have prepared a series of interesting tips and trick on how to set up your MX bike.
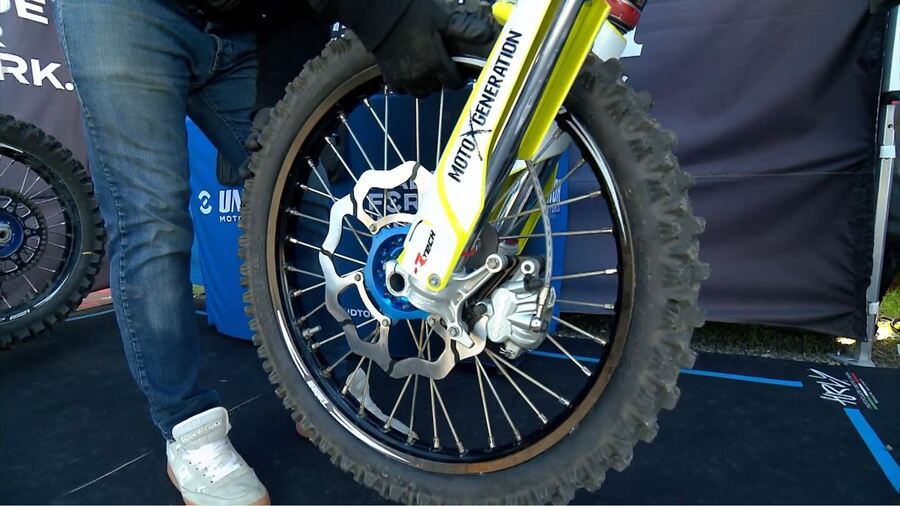
In the second video in the '5 Top Tips to Set Up MX Bike' series we will focus on how to change your front disc. We are going to change it with a bigger disc, to get more power breaking.
Roman's expertise will showcase all the tips and tricks, and his easy-to-follow steps will equip you with all the necessary knowledge. So, follow Roman Jelen by watching this video or follow our steps in the blog below …
Let's start!
The process is very simple for a passionate and focused motor bike driver.
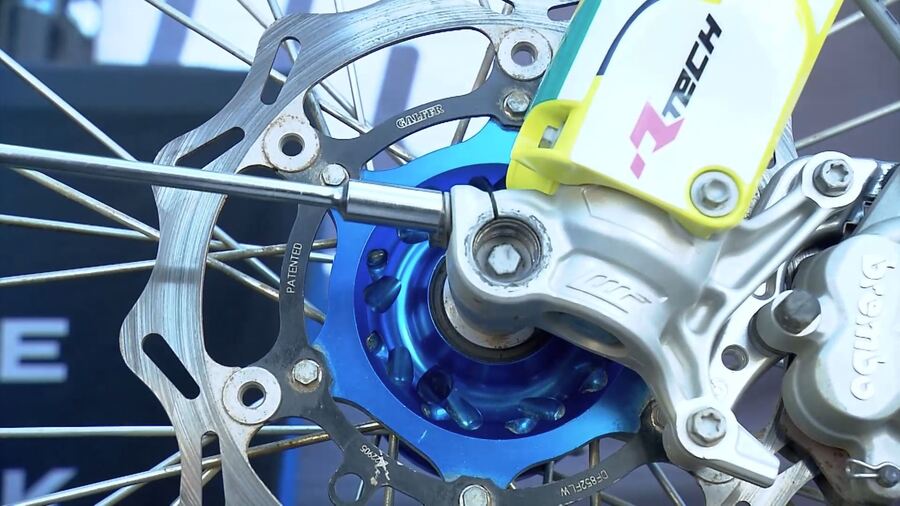
First, we are going to untight the nut to get out the front axle. Than we are going to take off the front wheel, so it will be easier for us to get to the rotor and untight the six small screws. This is how we can replace our disc with a new one, much bigger. We will also take off the front caliper, because we need to change the adapter – because of the new bigger disc, we need to position the caliper a little bit backwards.
Are you ready? Let’s do it together!
What will we use from the hand tools? We will use our Unior MX Pro Kit tool set. This is where we can also find the tools that we need; ratchet, socket number 10, 17 and T-handle to take off the front wheel.
If you don’t have this selection of Unior hand tools at home, feel free to visit our web page uniortools.com or contact us.
Follow the video where you can see how easy it is to do this at home!
First, we need to untight the front wheel. You can also use your hand to help yourself for a faster workflow. When untighten the screws use Unior T-handle. Grap the wheel tightly and put it on the floor.
Now you must untight the six screws with Unior T-handle and replace the disc with a bigger one. Very easy even for a non-experienced moto driver.
Just take off the front disc and replace it.
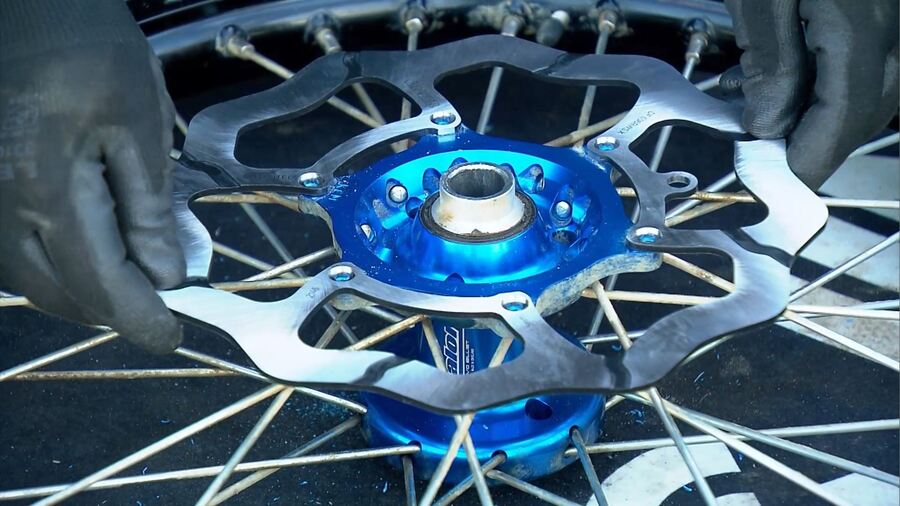
Now that we have changed the disc, we must put the screws back on. I put some glue also on it, for better grip, so let’s tight them back. Nice and firm so it will last for a long time.

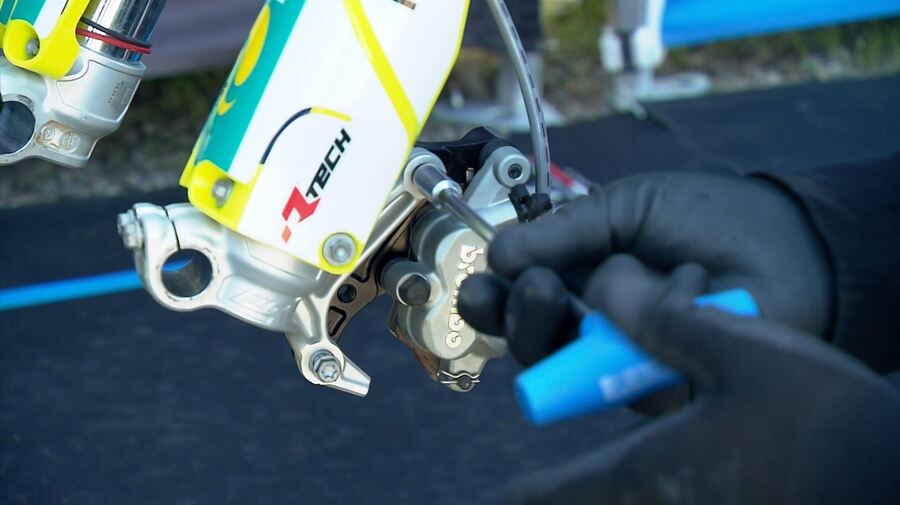
Now that we have changed the disc, we need to also change the adaptor on the caliper. We are going to use the ratchet with the number 10 socket and later also the number 10 T-handle wrench.
Follow the video to get more detailed information
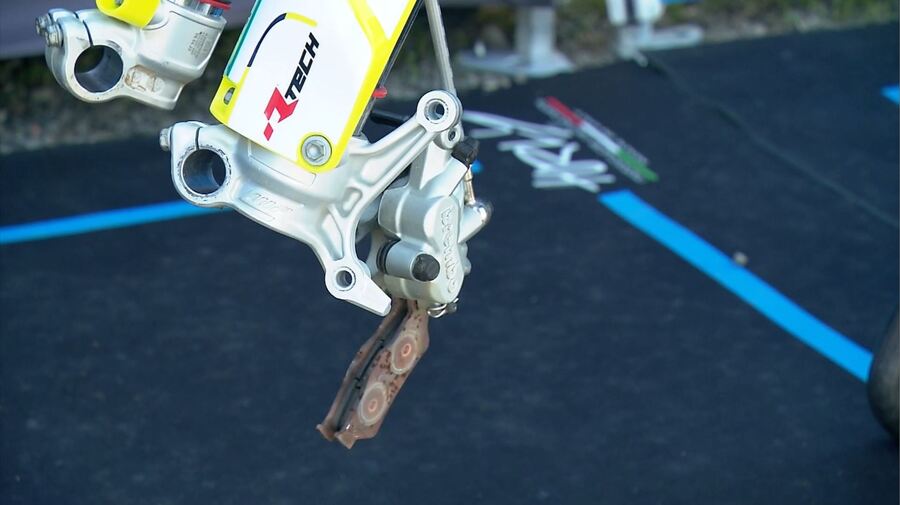
Now we need to untight the two screws, easy and fast. We need to replace the old with the new adapter. That’s it!
After we are done, we need to put everything back into the order. So, tight the two screws back in.
When finished we need to put back also the wheel and our job is done.
Spin it around at the end to see if you have done a good job.
Then the bike is ready, so let’s hit the track to test our motor bike.
Thank you for following us and don’t forget to read our third blog. It will be available soon!